Sony A7 Lens Adapter Settings

The Sony A7 is hard to navigate and related settings are in different places.
These are the settings I used on my Sony A7. They’ll be similar to a A7R and A7S.
My favorite lens to adapt was the Vivitar 90mm f/2.8.
Focus Magnification
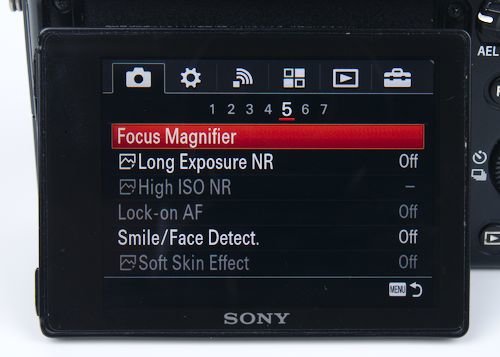
The Focus Magnifier setting aids with manually focusing adapted lenses.
When the assigned custom button is pressed the screen or EVF will show a 5.9X magnified view of the focus point. Pressing it again increases the magnification to 11.7X
Selecting the focus magnifier from the menu will cause the center button on the control wheel to control one cycle of magnification.
A custom button can be assigned so that you don’t have go into the menu every time you want to use this feature. I have my C2 button set to activate the focus magnifier.
Long Exposure Noise Reduction

Any shutter speed that is 1 second or longer is considered a long exposure. The noise reduction process will take place after the image has been taken.
Noise reduction will take the same amount of time as the exposure. For example, a 30 second exposure will have 30 seconds of noise reduction processing after the image has been taken.
During processing time another image will not be able to be captured and camera settings will not be accessible.
Having this setting on will improve image quality, unless you are planning to do post processing to RAW files. Noise reduction available in software will do a batter job than the camera.
Using long exposure noise reduction will also reduce the bit depth to 12 bits for RAW files.
Leaving it off will produce 13 bit RAW files. Using the bulb mode for exposures for longer than 30 seconds will also cause the RAW files to be 12 bit.
For more information and how it effects check out a discussion of Color Banding with the A7 at TalkEMount.com.
High ISO Noise Reduction
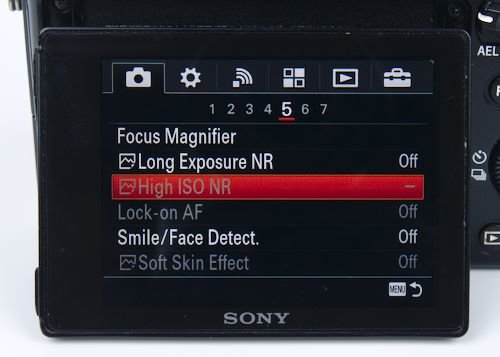
High ISO NR will apply noise reduction post processing to JPEG images. The option does not apply to RAW files. The process may take some time after an image has been taken.
While the processing is taking place you will not be able to take additional images or access menus. The processing will reduce battery life.
Saving Settings to Memory
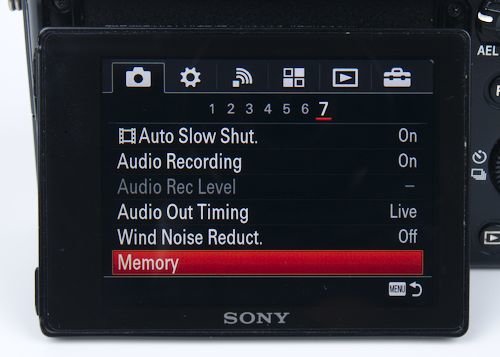
Memory allows some current camera settings to be saved to one of two memory slots. The settings can be recalled by switching the mode dial to either 1, or 2.
Switching to one of the memory slots on the dial will not override the current M/S/A/P settings. Switching back to any of the M/S/A/P modes will bring back the last settings used.
My problem is that important settings are not saved. The ‘Live View Display,’ ‘Display Quality,’ ‘Power Save Start Time,’ ‘Focus Peaking,’ and so many other options that I want to use cannot be saved.
Any option that does not show up in 4 pages that come up when one of the memory modes is selected will not be saved.
I find this annoying as I cannot setup the camera for use with flash and without. All of my flash triggers are “dumb” and only use the center pin. I believe a Sony flash will automatically toggle ‘Live View Display’ when used.
Depending on how and with what lenses you use your camera the memory settings can be helpful. The settings may be partially useful for video, but options are still going to have to be manually changed.
I really hope custom memory settings have been improved in later versions of the A7.
Zebra Settings

This will display zebra stripes on the screen/EVF in areas that exceed the brightness level selected. This is used to make sure that highlights don’t get blown out.
If you shoot JPEGs or video, this setting can be helpful. For RAW files, the display is based off JPEG previews, so the full dynamic range won’t be shown.
If you haven’t tried zebra stripes before, this is a setting worth testing out.
I shoot RAW 95% of the time, use flash a majority of the time, and use focus peaking. I dislike the combination of zebra stripes and focus peaking as it results in too much extra stuff going on in the display.
That’s why I default to keeping this setting off.
Manual Focus Assist
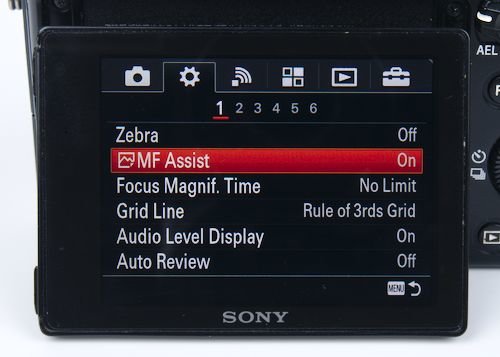
MF Assist Automatically magnifies an image like the focus magnifier. Only works with native e-mount lenses that have CPU contacts on them. I am not sure if it works with A-mount lenses and any of the OEM Sony adapters.
Focus Magnification Time

Focus Magnif. Time sets how long an image will be magnified with using the focus magnifier or MF assist. The options are 2 seconds, 5 seconds, or no limit. I have mine set to no time limit.
Focus Peaking Level & Peaking Color
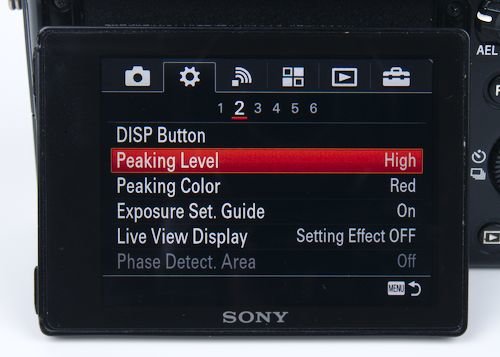
Focus peaking will display the designated color where the image is in focus. This is helpful for manually focusing. I have my level set to HIGH, and color to RED. Make sure to play around with the settings to find what you like the best.
Live View Display - What You See is What You Get
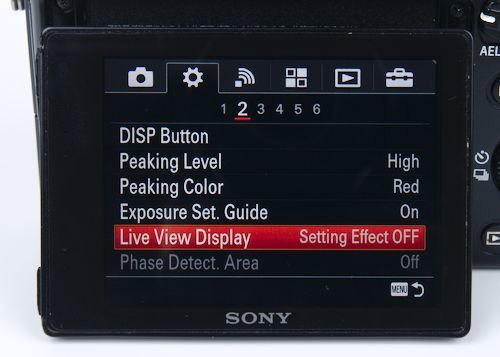
Turning Live View Display on will give a preview of the exposure on the screen or EVF. This feature is sometimes referred to as WYSIWYG. (What you see is what you get).
The feature works well when using available or constant lighting. If you’re using flash, the setting is useless and should be turned off.
Another downside of the feature is that the preview does not reflect the full dynamic range available for RAW files. What is being shown is a JPEG. The camera can show clipping before it actually takes place in the RAW file.
Release Without Lens
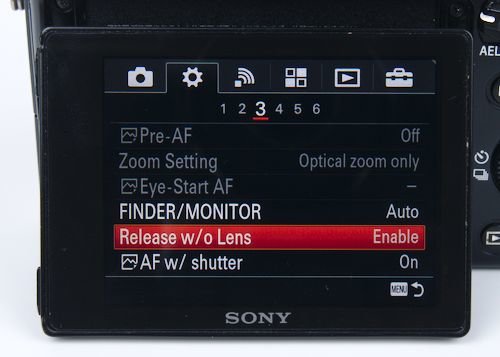
Release w/o Lens allows the A7 shutter to fire when adapted lenses are used on the camera. Without this setting turned on the camera will display an error message.
I am not sure if this setting is required if using a smart adapter with CPU contacts.
Electronic Front Curtain Shutter

Turning e-Front Curtain Shut. on can cause problems with fast adapter glass shot at high shutter speeds. Out of focus areas will be underexposed resulting in ghosting in the bokeh.
What should be round bokeh balls will turn into half circles. The problem is likely to appear at shutter speeds greater than 1/1000th of a second.
The official Sony help guide recommends turning the electronic first curtain shutter off when using adapted lenses.
Jim Kasson did extensive testing of the EFCS on the A7 and A7R. The A7R had problems with shutter shock so using the electronic first curtain shutter as much as possible would increase image quality. There is not a noticeable benefit to turning this feature on in the A7.
Assigning Custom Buttons & Function Menu
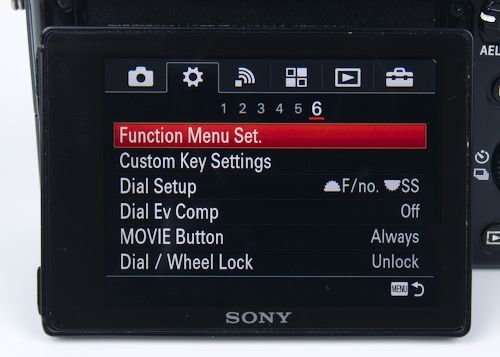
Function Menu Set. allows functions to be mapped to the custom buttons, AEL, AF/MF switch, control wheel, center, left, right, and down buttons. This makes using the camera much easier. I have the focus magnifier set to the C2 button. IMO, adapted lenses would be borderline unusable without having a dedicated button for the focus magnifier.
Function Menu Set allows all 12 of the options in the function menu to be changed. This is helpful for settings that you would like quick access to.
The buttons and settings are limited. Settings that are not listed cannot be assigned. This is annoying as unlisted settings are harder to change than they could be.
Airplane Mode
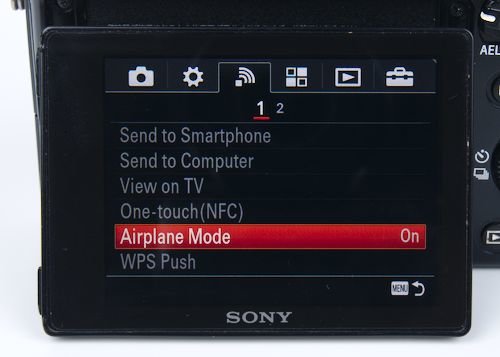
Battery life is poor on the A7. To help extend battery life as much as possible I keep airplane mode on. Every little bit helps as the camera quickly drains batteries.
Display Quality Settings

Sony is unclear on what this setting actually does. The two possibilities are that Display Quality set to high increases the resolution or frame rate. My guess is that it increases the display frame rate. Regardless, the high setting uses more battery and can slow down AF speed. I keep the setting on High.
Power Save Start Time
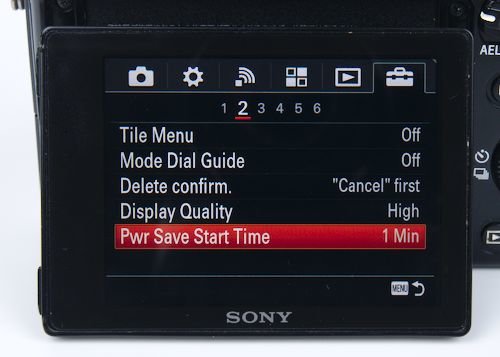
There are 5 time settings for Pwr Save Start Time. 10 sec, 1 min, 2 min, 5 min, and 30 min. There is a slight delay in when photos can be taken when returning to shooting mode. Go with the shortest amount of time you can tolerate to save battery life. I currently have my camera set to 1 minute.
Power zoom lenses will retract 1 minute after going into the power save mode if set to 10 sec. I don’t know what will happen with the other settings.