Don't Strip Screws: JIS vs Phillips Screwdrivers

Stripping a screw can end a repair. The most common cause of a stripped screw head is from using the wrong screwdriver.
For cameras, lenses, and other products made in Japan, JIS cross point screwdrivers are required. (Japanese Industrial Standards)
At a quick glance, JIS screw heads look similar to Phillips. Using a Phillips screwdriver increases the chance of stripping the head of a screw.
What’s the Difference Between a JIS Cross Point and Phillips Screwdriver?

The head of a JIS type S screwdriver has almost square edges. Looking straight on, it looks like a +. The tip of the screwdrivers also comes to a sharper point.
Due to the differences in design, JIS cross point screws can handle significantly more torque than a Phillips screw.
A Phillips head also resembles a plus sign, but the inner corners are more rounded. The Phillips screwdrivers also have a more rounded tip.
The complete details of the Phillips design are specified as an ANSI Type I Cross Recess.
Why Phillips Screws Strip So Easily
Phillips screwdrivers are designed to “cam-out” and strip the heads of screws. This is due to a revision of the screw design for use in the aircraft industry.
When too much torque is applied, a Phillips screwdriver will cam-out, and strip the screw. This was preferable to damaging an aluminum aircraft part.
Unfortunately, the same principle applies when removing a stuck screw. The screwdriver will cam-out, leaving you with a stripped screw.
This is why you see a switch to Torx and tri-point screws. They are less likely to strip.
Why Phillips Screwdrivers Strip JIS Screws
A Phillips screwdriver can be partially inserted into a JIS cross point screw. Contact will only be made with the center part of the screw.
If the screw does not come loose, the screwdriver will cam-out. With a limited amount of surface contact, and on the weakest part of the screw head, they will easily become stripped.
Multiple attempts with additional pressure will result in a completely stripped screw head.
Best JIS Screwdrivers
Stick with name brand screwdrivers from Japan, Germany, or the US. Cheap screwdrivers are made from soft metal that will deform. You also won’t have to worry about incorrect tolerances.
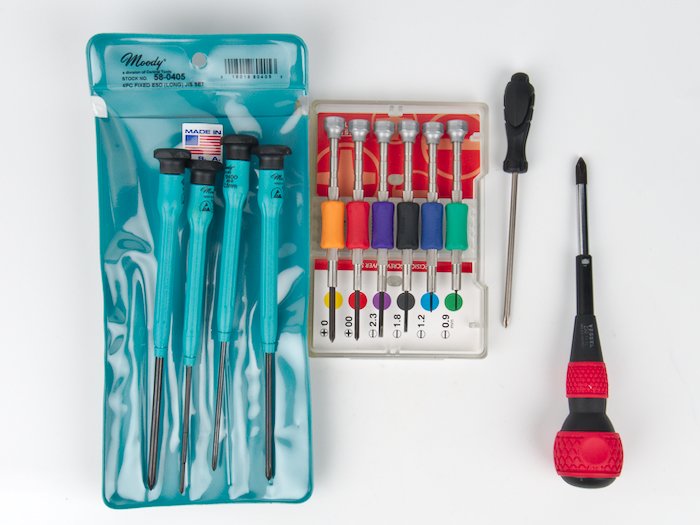
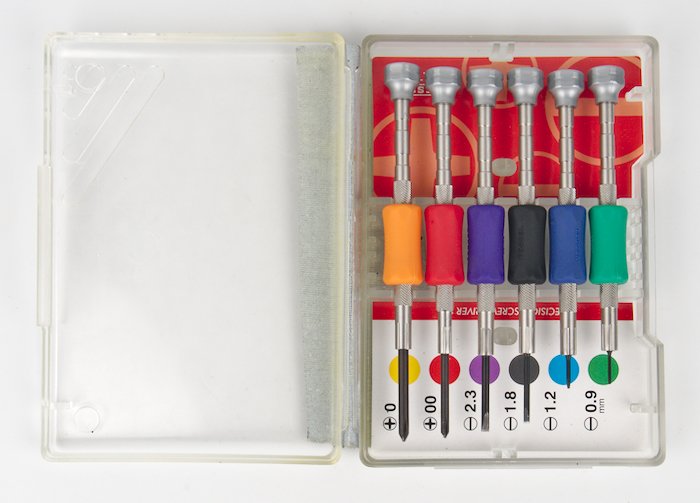
Vessel

Not my favorite brand. However, a set should be the first JIS screwdrivers you buy.
The best feature of Vessel screwdrivers is the rubber grips. They are there to prevent damaging screws.
The rubber will lose grip of the screwdriver shaft, long before you need to worry about stripping the head of a screw.
When you encounter a screw that you can’t remove, you’ll be able to reevaluate the situation instead of stripping the screw head.
This is great for the small screws you encounter inside of lenses and cameras.
Affiliate Advertising Disclosure
Outside the Shot is a participant in the Amazon Services LLC Associates Program, an affiliate advertising program designed to provide a means for sites to earn advertising fees by advertising and linking to Amazon.com.
As an eBay Partner, I may be compensated if you make a purchase. I also participate in affiliate advertising programs with KEH and Adorama. More can be found on the Affiliate Disclosure page.
The set of Vessel screwdrivers I have is the TD-56.
A downside to the screwdrivers is that the shafts are short. I have run into several situations with camera lenses, where they were not long enough to reach a screw in a tight spot.
They come in a nice plastic case. The “hinge” which was just a thin strip of plastic, broke after a few days. I fixed the case with a piece of gaff tape.
The durability of the screwdriver tips has been excellent. There are some signs of wear. They haven’t ended up mangled like no-name brands I’ve used in the past.
Hozan

I own one of these because I was not able to generate enough torque with the Vessel #0 screwdriver. The longer shaft was also a bonus.
The handle is the most comfortable handle I have encountered on any small screwdriver. It is easy to grip with two fingers and a thumb.
The printing that identified what the screwdriver rubbed off. This is annoying because without it is hard to tell if it is a #0 or #00.
If I ever needed larger screwdrivers, this would be the brand I would choose.
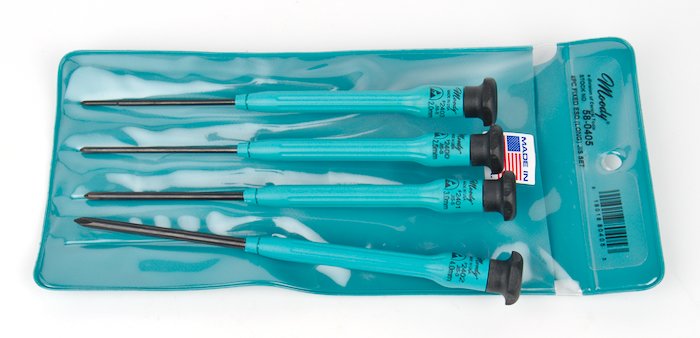
Moody Tools

The long handle allows for a strong grip to apply a significant amount of downforce and torque. This is needed for screws that are rusted or have thread lock applied to them.
Without this set of screwdrivers, I would not have been able to repair my Mamiya RB67 Pro S.
As an added bonus they are ESD safe. You won’t have to worry about electrostatic discharge damaging components.
How to Remove a Stuck Screw
Here are some tips and tricks to help you remove a stuck screw.
When you come across a screw that just won’t budge, slow down. Damaging the screw will make the situation worse.
Use the Right Screwdriver
Double-check to make sure you are using the right screwdriver. That means both size and type of head.
Make sure you’re not using a Phillips screwdriver on a JIS screw.
Also, check the size of the screwdriver you’re using. A #0 will often work on a #00 screw.
However, the #00 screwdriver will work the best. You’ll also reduce the chance you strip the screw.
For electronics and laptops, using the correct size is very important. All sorts of specialty screws get used in order to make repairs difficult.
Torx bits are commonly used. For Apple products, you’ll need tri bladed screwdrivers.
Distilled White Vinegar for Rusted Screws
For many situations, using a penetrating oil such as WD-40 is not an option. While they do work well, penetrating oils have strong solvents in them that will damage plastics, rubber, and adhesives.
Vinegar is a great alternative as it will neutralize rust and battery corrosion. Plus, it does not give off strong fumes.
Any vinegar can work. I use distilled white vinegar because it is cheap.
You can use a cotton swab to apply a small amount to a screw head. Be patient and keep applying small drops every 5 to 10 minutes.
For lenses, be on the look out for lens fungus because the rust is a sign of moisture.
Check for Lacquer or Thread Lock
With vintage cameras and lenses, the heads of screws often have lacquer applied to keep them from coming loose.
Newer cameras, lenses, laptops, and other electronics will use blue thread lock.
Removing Lacquer
The lacquer will fill up the heads of screws, making it difficult to fit the tip of a screwdriver in. It can also have been used as a thread lock.
Acetone will dissolve the lacquer. The easiest way to get a small quantity of acetone is to buy nail polish remover.
A small amount of nail polish remover on a cotton swab will quickly remove surface lacquer.
If the lacquer has been used as a thread lock, you’re going to need to be patient. This is especially true for retaining rings found in lenses.
Use a small amount of nail polish remover to the screw. The nail polish remover will work itself down and loosen the threads. Be patient.
Be careful about getting the nail polish remove on lenses. It likely won’t damage lens coatings, but it could cause balsam separation.
Blue Thread Lock
Blue thread lock is designed to prevent a screw from coming loose due to vibrations. It will also protect the threads from rust and corrosion.
You can break the screws free with enough force. For that to happen, you need to be using the correct screwdriver.
If it just won’t budge, you can try applying heat. Soldering irons are a good choice for this. However, this isn’t an option if there is plastic around the screw.
Try Applying Heat
Applying heat will weaken thread lock and help loosen rusted screws.
On larger pieces of equipment, like a motorcycle, you might be able to get away with using a torch.
For a lens, camera, or electronics, try using a soldering iron. Place the tip of the soldering iron on the head of the screw. (Don’t do this if the screw is in plastic.)
Try not to touch the metal surrounding the screw. It will act as a heat sink and prevent the screw from getting hot.
How to Remove a Stripped Screw
Evaluate the value of what you’re trying to repair. It may not be worth the cost and effort to remove a stripped screw.
The tools needed can be expensive and aren’t guaranteed to work.
Selling the item for parts or repair is an option. You can then buy a replacement and save yourself some time.
Screw Extractors
There are a few different kinds of screw extractors. They can also be referred to as left-handed drill bits.
You may also need to combine the techniques for removing a stuck screw with the extractors. If you stripped a rusty screw, you’re still going to need to deal with the rust in order to remove the screw.
Micro Screw Extractors
For smaller screws, there are extractors that have tips similar to a brad point drill bit. They will not be threaded.
The points of the extractor will hopefully dig into the outer edges of the screw. By keeping downward pressure on the screw, you can hopefully remove it.
I’ve only been able to find one set of extractors for small screws. The Moody Tools 58-0670 6-piece set.
Left Handed Drill Bits
Left-handed drill bits are a good option because they are available in small sizes. You will have to buy the small bits online.
You’ll also want a pin vise to hold small bits. You can find a 1.0mm left-handed drill bit (Amazon), as well as many pin vises.
They are used counter-clockwise, the reverse of a regular drill bit.
You use them to drill into the stripped screw head. Once the bit bites into the screw head, the counter-clockwise rotation will remove the screw.
Make sure to only use bits that are designed for screw extraction. You don’t want to drill the screw out.
Spiral Fluted Extractors
These are the most common screw extractors. They are reverse threaded and tapered.
These are the most common screw extractors. You’ll be able to find them at a hardware store.
To use one, you set your drill to low speed and reverse (counter-clockwise). The extractor will bite into the head of the screw. After that, the screw will begin to be removed.
Unfortunately, the smallest screws these are sold for are #1. They will not work for smaller screws.
For larger screws, this would be the first thing I would try.
Drill It Out and Tap New Threads
In the worst-case scenario, you can drill the screw out. This will also mean that you will need to re-tap the threads for the hole to a larger size.
Ideally, you would use a drill press when drilling out the screw. This will give a nice 90-degree hole.
After that, you’re going to need to use a tap and die set to cut threads into the hole.