Ettl vs Ttl Flash

All of the jargon used in flash photography can be difficult for to understand. Knowing what acronyms means will make it easier to understand the technical aspects of using a camera flash.
This explanation will focus on Canon Speedlites, which what Canon calls their flashes. You may also see them referred to as Speedlights, which sounds the same, but is Nikon’s brand name for their flashes.
What does TTL Stand for?
TTL stands for Through-the-Lens, and applies to several camera features. The most notable features are that you see through the lens when you look into a viewfinder and light is also metered that way.
SLRs, DSLRs, and digital mirrorless cameras allow you to see the frame that will be captured through the lens. This is not the case with a rangefinder camera, such as Leica film cameras.
A major advancement was TTL light metering. Instead of having to use a handheld light meter, one was built into the camera. Though this was first limited to ambient light.
What is TTL Flash?
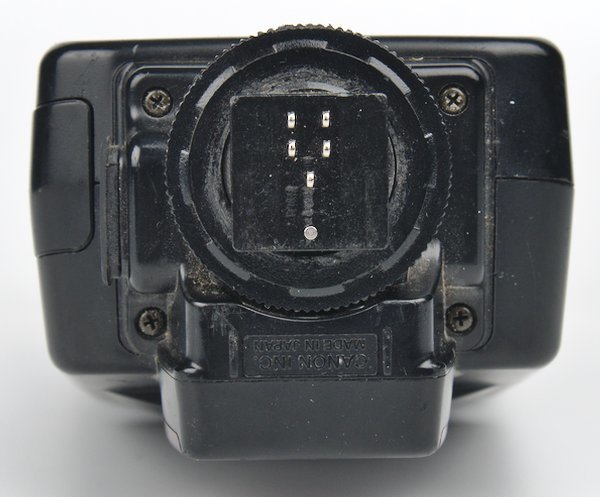
A TTL flash has the ability to receive information from the camera’s light meter. This is done through the multiple contacts on the camera’s hot-shoe.
With metering information from the camera, TTL flashes will automatically set the power output. With modern equipment, the metering will be very accurate, allowing you to capture well-exposed images.
Keep in mind that there are many different versions of TTL flashes for each camera manufacturer. Canon’s 35mm film FD-mount cameras had TTL and A-TTL (took ambient light into account) Speedlites.
When Canon switched to the EF-mount for EOS cameras, they took the opportunity to use a new protocol for communication between the camera and flash or flashes being used.
Problems with Incompatible Protocols
Older TTL Canon Speedlites will not work correctly on the newer EOS 35mm film and DSLRs. What is likely to happen is that the Speedlite will only fire at full power.
If the Speedlite has manual controls, you will be able to use it in manual mode. This also holds true for third party options with manual controls.
What does ETTL Stand For?
E-TTL stands for Evaluative Though-The-Lens.
The ETTL system uses a preflash before a photo is taken to improve the quality of the exposure. This allows for the same evaluative metering sensors to be used that are used for ambient light.
TTL and A-TTL flash modes use a dedicated flash metering sensor. With tricky ambient light, these modes can produce subpar results compared to ETTL.
Also, because of how ETTL works, bouncing the flash off a ceiling or using light modifiers, will not cause any exposure problems. Doing this with earlier TTL systems is likely to result in underexposed photos.
What is Different About E-TTL II?
With E-TTL II, the control over exposure was moved to the firmware inside the camera body. This allows for additional calculations to be done and removes the need to provide firmware updates to an external flash.
E-TTL II was first released with the Canon EOS-1D Mark II in 2004. Improvements include taking into account lens-to-subject distance, does not weight metering to where the focus point is, and better deals with areas that could cause hotspots.
Canon E-TTL and E-TTL II Speedlite Flashes
- Canon Speedlite EL-100
- Canon Speedlite 470EX-AI
- Canon Macro Twin Lite MT-26EX-RT
- Canon Speedlite 600EX-RT
- Canon Speedlite 600EX II-RT
- Canon Macro Ring Lite MR-14EX II
- Canon Speedlite 430EX III-RT
- Canon Speedlite 270EX II
Advantages of Using Manual Flash
Manually setting the power on a flash has the benefits of control, repeatability, and cost. Third party flashes, such as ones from Yongnuo, cost significantly less than a Canon flash.
For creative effects, you might want to over or underexpose part of the image. For example, if you are using a flash as a hair light. Another common time when you would want manual control is for a fill light.
Power settings for Speedlites are displayed as fractions. At 1/1, the flash will output the maximum amount of light. 1/2 is half the output, 1/4 is a quarter of the output, and so on until 1/128.
Depending on the Speedlite, you can also have fractional steps that would be displayed at 1/2 +0.3, or 1/2 +0.6. The more steps you have, the better, as you’ll have better control over your lighting.
Light Output Duration
Another important factor is the duration of the flash. The lower the power on a flash, the shorter the duration of light output will be.
For freezing action, a shorter flash duration is better. If you can kill ambient light by turning off lights, or using a smaller aperture, the flash duration will essentially become the shutter speed of the camera.
Examples of taking advantage of this can be seen in photos of glass breaking or falling water droplets.
Metering for Manual Flash
The quick and dirty way to meter for manual flash is to take a photo and check the results on your camera. A downside of doing this is that you’ll not be able to easily recreate the results in the future.
A better way is to use a handheld light meter that has flash metering capabilities. You can use an incident or spot light meter. Some advanced models have both functionalities built-in.
By using a light meter, you can quickly recreate lighting setups and ratios. The more flash photography you do, the more important having a light meter will be.
A couple of inexpensive options are to look for a used Konica Minolta Auto Meter VF, or Minolta Spotmeter F.