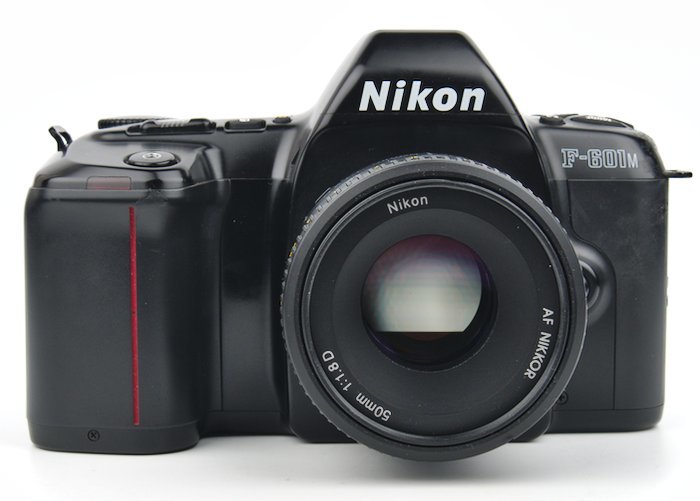
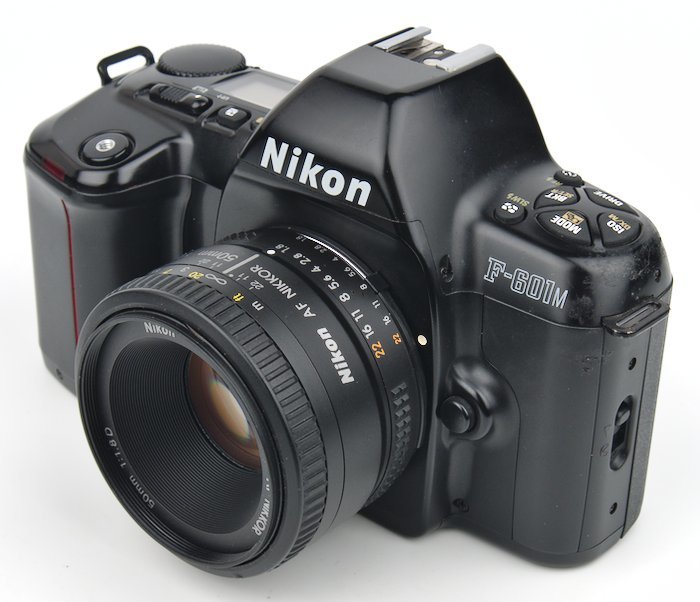
An Electronic Manual Focus Camera - the Nikon N6000 (F-601M)
 is a manual focus camera. The split prism viewfinder is great for slide duplication, macro photography, and manual lenses.")
Released in 1990, the Nikon N6000 is a manual focus electronically controlled camera. The body and controls are similar to the Nikon N6006.
Not having autofocus means the camera has a split prism focusing screen that you would see in older SLRs. The advantage of this is that manual focusing is easy.
Older manual focus F-mount lenses are a joy to use on the camera. Additionally, the camera is far better suited for macro photography than autofocus cameras available around the time of release.
The N6000 was known as the F-601M in Europe. (The N6006 was the F-601.)
Price & Where to Buy
The N6000 / F-601M is an uncommon camera. You will not always be able to find copies for sale.
In my opinion, it should be an inexpensive camera. However, due to scarcity, a seller may put a high price on the camera.
Affiliate Advertising Disclosure
Outside the Shot is a participant in the Amazon Services LLC Associates Program, an affiliate advertising program designed to provide a means for sites to earn advertising fees by advertising and linking to Amazon.com.
As an eBay Partner, I may be compensated if you make a purchase. I also participate in affiliate advertising programs with KEH and Adorama. More can be found on the Affiliate Discolsure page.
Your best bet is to check current prices on Amazon and eBay. If you aren’t happy with what’s available, check weekly and eventually the camera you want will show up.
Camera Battery - CR-P2
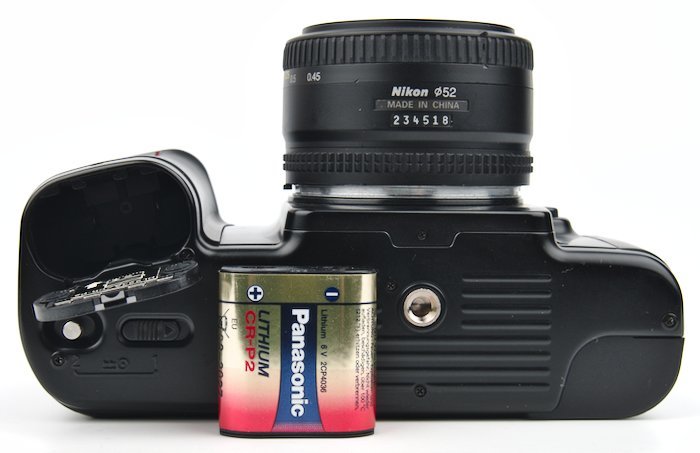
A single CR-P2 battery is used. In terms of non-rechargeable camera batteries, these are mid-priced.
You’ll always want to have a spare battery with you. The camera will not function without a battery.
You can find CR-P2 batteries in stores, but you’ll save a few bucks buying online. There are many available at Amazon and eBay.
Shutter Speed & Shooting Modes
Shutter speeds range from 30 seconds to 1/2000 of a second in full-stop increments. There is also a bulb mode.
The maximum flash sync is 1/125 of a second. (The N6000/F-601M does not have a built-in flash.)
Shooting modes include:
- Program
- Auto Multi-Program
- Aperture Priority
- Shutter Priority
- Manual
There is a built-in motor drive to advance the film. Film advance settings can be set through the drive button. The 3 shooting speeds are available:
- Single Shot
- Continuous low - 1.2 fps
- Continuous Hi - 2 fps
Exposure Compensation
Exposure compensation can be set from +5 to -5 in 1/3 stop increments.
Bracketing
Bracketing shots can be done in groups of 3 or 5 with 0.3, 0.7, or 1 EV differences between each frame.
Viewfinder & Focusing Screen
The focusing screen can not be removed. It is a Nikon Type K screen, which has a central split-image rangefinder circle, microprism collar, and matte outer field.
The biggest benefit of the split prism is the ability to accurately focus when doing closeup and macro photography. Even on modern digital cameras, autofocus does not work well for macro photography.
The viewfinder is a pentaprism, which is much higher quality than the pentamirror found in lower-end camera models. With a 50mm lens, the viewfinder has 0.75x magnification and covers 92% of the frame.
Why a Split Prism for Macro?
At macro magnification, having a thin depth of field means any camera movement will change the focus point. Trying to use autofocus will just cause the camera to continually hunt for focus. A tripod can help, but the focus still won’t be perfect every time.
The next issue is if you want to use extension rings, a bellows, or manual focus lens, the autofocus is not going to work. Plus, the focus indicator will be unreliable as there may not be enough light hitting the phase-detect sensor in a DSLR.
Mirrorless cameras handle the situation much better, as long as they have some kind of manual focus assistance. In 1990, the N6000 / F-601M would have been an attractive choice for macro photographers.
Metering Modes
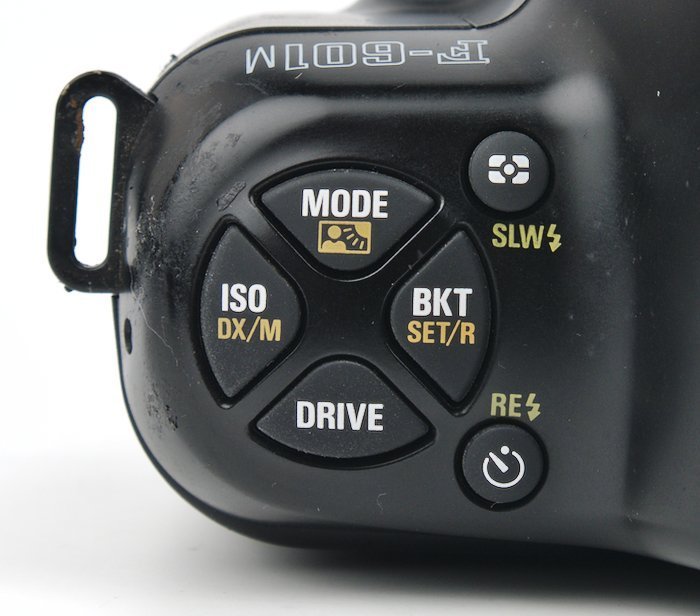
There are 2 metering modes. You can switch between them by holding down the metering button and rotating the command dial.
Matrix Metering
Matrix metering is ideal for use with auto exposure modes. It will attempt to get a correct exposure for the center of the frame. This is done by analyzing 5 areas of the frame for brightness and contrast.
Center-Weighted Metering
Center-weighted metering puts 75% of the metering weight in the 12mm center circle seen through the viewfinder. Using center-weighted metering is helpful for metering shadows or highlights in manual mode.
ISO Settings
Setting the ISO of the film can be done manually or automatically for DX-coded 35mm film. Using manual mode will allow you to override the DX-coded settings.
Switching between DX and manual is done by holding down the shift button (has a square on it above the LCD) and pressing the ISO button.
- DX-coded film has a range of 25to 5000 ISO
- Manual ISO has a range of 6 to 6400 ISO
What 35mm Film to Use?
The Nikon N6000 / F-601M uses 35mm film. This is the most widely used type of film. It is still widely available. The film comes in a light-tight metal cassette that makes it possible to load in light.
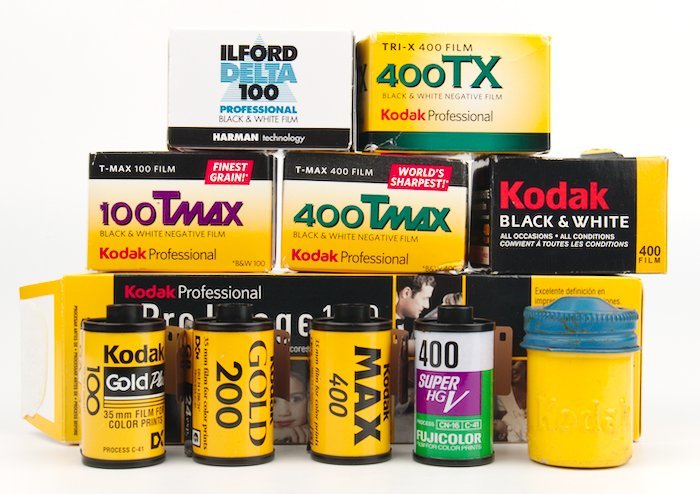
A variety of color and black & white film is available online. You may be able to find rolls for sale at big box and drug stores, but your selection may be limited.
What film to use?
400 ISO is my default recommendation for any camera. That film speed is fast enough to use indoors or in shade. Outside, in direct sunshine, the film is not fast enough to limit the maximum aperture you can use due to not having a fast enough shutter speed.
A lower speed ISO, like 100, will not be usable indoors without a flash, powerful continuous light source, or tripod.
A tripod will only work for a static subject. The shutter speed will most likely need to be slow enough to where even people standing still will have enough movement to look slightly blurry.
Infrared Film can be Used
Unlike some cameras, the N6000 does not have an infrared sensor to help with the film advance. This means infrared film can be used in the camera.
Loading Film
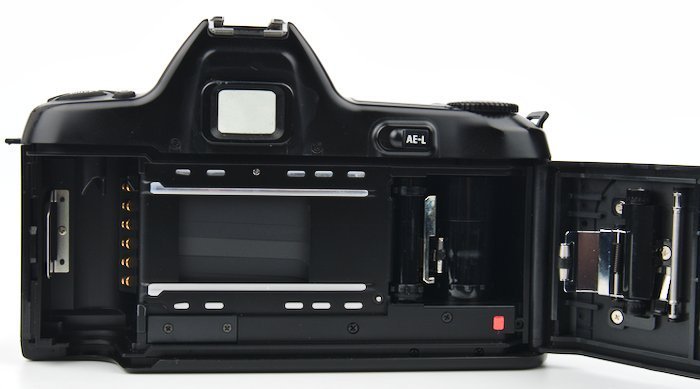
Loading the film is easy. All that you need to do is to put the film in and pull the film leader to the red box. Then close the camera.
Where to Develop Film?
Other than a few small businesses, most stores no longer develop film in the store. Instead, they mail the film to a lab to be developed and scanned. The downside to this is that you will not get your negatives back.
Another option is to mail off your film to a lab, such as The Darkroom. Doing this will ensure that you get your negatives back.
The last option is to develop the film at home. You will need some basic equipment. Developing black & white film is easy. Color film is a bit more of a challenge to get good results.
Lens Mount - Nikon F-Mount
The Nikon F-mount has more lenses available than any other lens mount. There are 60 years worth of lenses to choose from.
Additionally, third party support has been and is still strong.
Several variations of F-mount lenses exist. Lenses that are compatible with the N6000 are Ai/Ai-S, Series E, AF, and Series D.
Series G and lenses without physical aperture rings will not be usable in Manual or Aperture Priority modes. Those lenses can be used in Program, Auto, and Shutter Priority modes.
If you want more information on lens compatibility check out: Nikon F-Mount Lens & Camera Compatibility.
Recommended Lenses
- Nikon 50mm f/1.8 Series E
- Nikon Nikkor 50mm f/2 AIS
- Nikon 28mm f/2.8 Series E
The manual unsurprisingly lists all of Nikon’s macro lenses for use with the camera. Having used most of the lenses, there are less expensive third party lenses that have better image quality.
N6000 Camera Manual
A scanned PDF copy of the Nikon N6000 camera manual can be found on Butkus.org.
Accessories
The N6000 manual lists a surprisingly large number of accessories. A large portion of them are dedicated to macro photography.
All of the close-up attachment lenses and extension tubes are listed. As well as eyepiece correction diopters and a DG-2 viewfinder magnifier.
Bellows
The manual talks about the Nikon PB-6. It also briefly covers the reproduction ratios possible with a 50mm lens, and a bit of the technical limitations that come along with using a bellows.
However, I think the Nikon PB-4 is a slightly better choice for macro photography. On the used market, there is not much of a difference in price, so they are both worth checking out.
Nikon Speedlights
Here are all of the Speedlights that were recommended in the manual. Newer flashes will work with the N6000 and can be a better choice as the recycle times on them will be faster.
- Nikon SB-24
- Nikon SB-23
- Nikon SB-22
- Nikon SB-20
Mini Review
3.5 OUT OF 5 STARS
For manual focusing on a film camera, I have a strong preference for mechanical cameras. I find that the controls and feel of using a mechanical camera are more enjoyable than an electronically controlled camera.
I also have the luxury of having a Nikon FM2 and Nikon FG. Both of those cameras are smaller than the N6000, have physical controls, but are also more expensive.
Also keep in mind that I don’t care about having automatic exposure modes, aperture priority, or shutter priority modes on a film camera. If those are important to you, the camera should have a higher rating for you.
For macro photography, the advantages of digital are too large to ignore. The higher the magnification, the lower the hit rate.
Investing in a stable “studio macro setup” makes it impossible to pass up the benefits of focus stacking. A WeMacro motorized focus rail makes taking the series of images needed for focus stacking a painless process.
The N6000 is a good buy if you can find a copy for under $50. Past that, you get into a price range where you can get an older manual focus Nikon, like the FG, in very good condition.