How to Load Film into the Minox 35 EL
- Nathaniel Stephan
- March 10, 2021
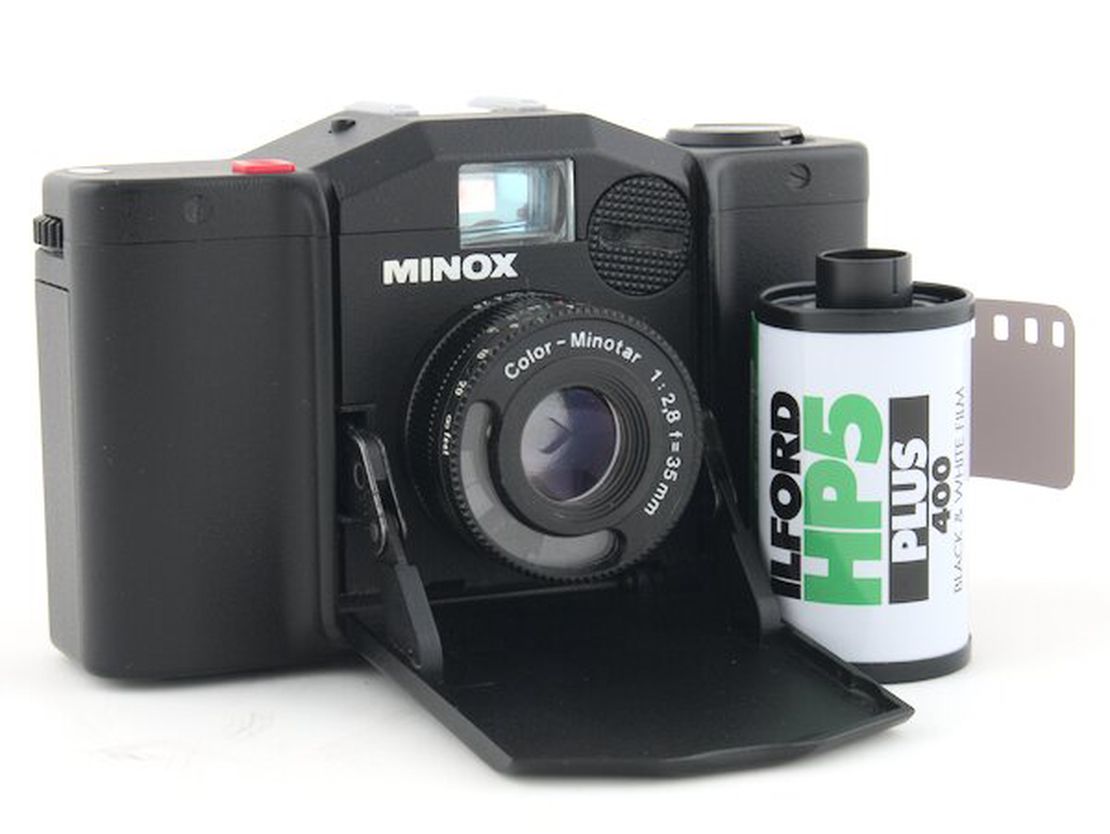
Table of Contents
This guide will show you how to load film into your Minox 35 EL as well as making sure the camera is working properly. If this is your first time using your Minox 35 EL, make sure to read through the before you load film section.
There are many different versions of the Minox. The 35 EL is the first version of the camera and the process of loading film is similar to later versions.
Step-by-Step How to Load Film
How to load film into the Minox 35 EL. For demonstration purposes, I am using a roll of film that has been exposed.
Unlock the camera back.

Unlock the Minox 35 EL film back To unlock the film back on the Minox 35 EL you need to move the switch on the bottom of the camera to the left so that the red dot is showing. It can take quite a bit of force to get the back unlocked.
Remove the camera back.

Remove Minox 35 EL Camera Back Slide the camera back down to remove it.
Load the 35mm film canister.

Load film into the Minox 35 EL camera Slide the film canister from the bottom of the camera towards the top of the camera. Take note of the orientation of the film leader. The film leader is the half-width cutout at the start of the film roll.
Align the film canister.

Minox 35 EL Align film canister with rewind knob prongs If you have any problems sliding the film canister into the camera, make sure that it is aligned correctly. The film rewind knob has prongs that need to fit into the film canister so that the film can be rewound when you have taken all of the exposures on that roll of film.
Insert the film leader into the take-up spool.

Film leader inserted in the Minox 35 EL take-up spool Gently pull the film leader over to the take-up spool. Thread the film leader into the gap between the take-up spool and metal that is partially wrapped around it.
Use the thumb advance lever to take out the slack.

Minox 35 EL remove film slack Use the thumb advance lever to pull the film tight to the body of the camera. Alternatively, you can use the film rewind knob, however, you need to be gentle so as to not pull the film leader out of the take-up spool.
Put the camera back on.

Minox 35 EL tilt film back Instead of sliding the camera back onto the camera, tilt it back on so that the film plane does not snag on the edge of the film. Then slide the camera back up into position. This will also make the process easier.
Slide the camera back all the way up.

Minox 35 EL Film back on Slide the camera back up and make sure it is aligned correctly and there are no gaps anywhere.
Lock the film back.

Lock Minox 35 EL film back Move the switch on the bottom of the camera over so that the red dot is now covered.
Set the ISO (ASA) on the camera.

Minox 35 EL Set Film ISO To set the film speed you need to turn the small dial on the bottom of the camera to the correct setting. The dial can be hard to turn. I’ve found that pushing down with my thumb, making as much contact with the dial, and then turning works best.
I would not recommend trying to turn the dial with a fingernail.Advance the film and fire the shutter.

Minox 35 EL Frame Counter Fire the shutter and advance the film several times until the frame counter is on the first frame. Depending on how careful you were pulling out film from the canister to load the Minox 35 EL, you might be able to get a photograph from the ‘0’ frame.
You’re ready to take photographs.
Congratulations! The Minox 35 EL is now loaded with film and ready to shoot.
Once you’ve shot the roll of film, check out this guide that will show you how to unload film from the Minox 35 EL.
Where to develop film? You can do it at home, or send it off to a lab to be developed and scanned.
How to Know When a Roll of Film is Done?
The film roll is used up when you are no longer able to easily crank the film advance lever. Never force the film advance lever as you could rip the end of film out of the canister or damage the camera.
This usually aligns with the number of exposures the roll contains that can be seen on the film counter, though you might be able to squeeze out an extra frame or two. Most rolls of film will have either 24 or 36 exposures.
Affiliate Advertising Disclosure
Outside the Shot is a participant in the Amazon Services LLC Associates Program, an affiliate advertising program designed to provide a means for sites to earn advertising fees by advertising and linking to Amazon.com. As an eBay Partner, I may be compensated if you make a purchase. I also participate in affiliate advertising programs with KEH, and WEX Photo Video. More can be found on the Affiliate Disclosure page.
Before You Load Film
Check the Battery

The Minox 35 EL is electronically controlled and originally used a 5.6V mercury battery. The batteries are no longer available due to the environmental damage that can be caused by mercury. There are a few substitutions available.
There are silver oxide S27PX and alkaline PX27M batteries available that can be used as substitutions.
I am using four LR43 batteries taped together, with a rolled-up strip of nickel as a spacer. Four 386/SR43 silver oxide batteries would also work. Either of those options will be the cheapest.
There are also PX27 battery adapters available if you do not want to tape batteries together or fashion a paper tube to hold them. They can be difficult to find and expensive.
Make Sure There is No Film Loaded in the Camera
If there is any film left in the camera, it will be ruined if it is exposed to light. The Minox 35 EL does not have a way to see if film is currently loaded in the camera.
If the red film frame indicator is to the left of the 0 (closer to the back of the camera) there is either no film loaded in the camera or it has been exposed by someone opening the film back.
If you see frames above zero, there is film in the camera. To remove it you can follow the steps on how to rewind and remove the film from the Minox 35 EL. These are the same steps you’ll follow once all the exposures on the film have been taken.
Make Sure the Minox 35 EL Functions Correctly
If your Minox 35 EL has not been used in a long time or if it is your first time using the camera, check to make sure the camera is functioning correctly before loading film.
Make sure you are able to cock the shutter with the thumb advance lever. The Minox 35 EL uses a double-action film advance so you will need to advance it twice.
The front cover on the camera will need to be folded down and the lens fully extended in order to be able to fire the shutter. I would also recommend removing the film back and set the lens to f/2.8. Point the camera as a light source or white wall and when you press the shutter release you should be able to see the shutter open and close.
Do Not Load Film in Sunlight
You can ruin your film by loading it in direct sunlight or bright light.
Bright light increases the risk of light piping. When this happens light is able to penetrate through the light seal on the 35mm film canister.
The film is not guaranteed to be completely ruined. You could end up with varying degrees of fogging.
Fogging can produce a range of undesirable outcomes such as a loss of contrast, blown out streaks, or a completely exposed frame. If this problem occurs it should subside with progressive frames.
For Best Results, Use Fresh Film
Film degrades in quality over time. It should also not be exposed to hot temperatures like those in a car on a sunny day or attic during summer.
Expired film can be used, but you are not guaranteed predictable performance.
For the best results, use a fresh pack of film that is not expired. My recommendations are: